Pictorial: Construction of a Rotary Screw Trap

A place for readers to talk about river fishing in Washington.
Forum rules
Forum Post Guidelines: This Forum is rated “Family Friendly”. Civil discussions are encouraged and welcomed. Name calling, negative, harassing, or threatening comments will be removed and may result in suspension or IP Ban without notice. Please refer to the Terms of Service and Forum Guidelines post for more information. Thank you
User avatar
Matt
Admiral
Posts: 2186
Joined: Sat Apr 28, 2007 1:56 pm
Location: WaRshington

Pictorial: Construction of a Rotary Screw Trap

Post by Matt » Thu Feb 17, 2011 6:23 pm

I recently started my second season working for Tulalip Tribes as an assistant fisheries biologist constructing, overseeing, and operating 2 rotary screw traps (commonly known as a smolt traps) on the Snoqualmie and Skykomish Rivers. The traps are used to study the outmigration of juvenille salmonids with an emphasis on Steelhead and Chinook outmigration numbers in this system. Our data is used to predict escapement and helps in the determination of Tulalip Tribal fisheries, as well as state mandated fisheries on the Snohomish River system and some NOAA research. Today, we were on the Skykomish installing the first of our 2 traps and I took some photos to share with you all. Recently someone had posted a picture of a trap and wondered what it was, so I decided to take pictures as we built ours to share with you all. Often we see these things in the river, but we don't fully appreciate the effort that goes into studies like this. The manpower and funding required for such projects are both extreme and this is just one example of a commonly used study procedure here in the PNW.

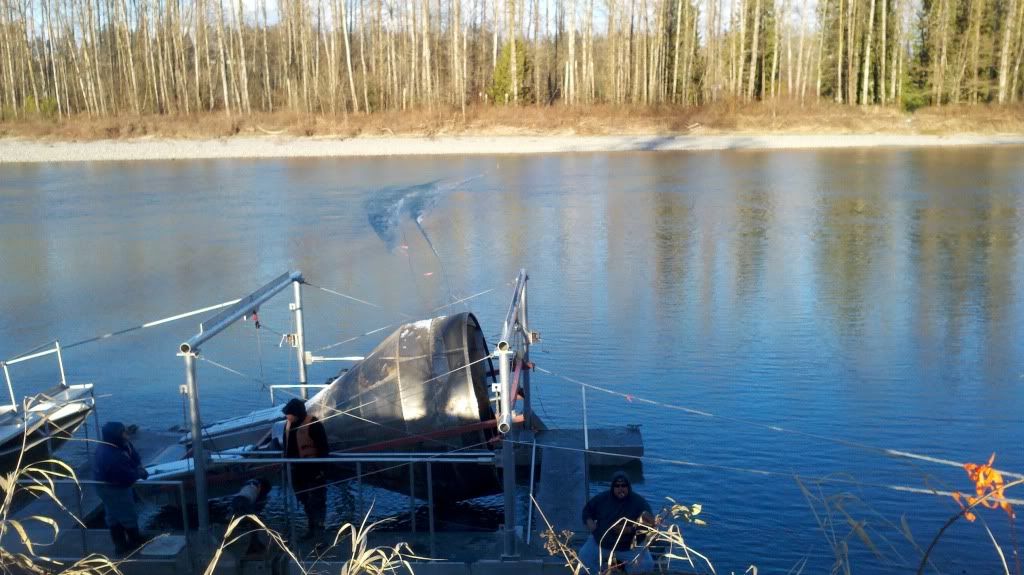
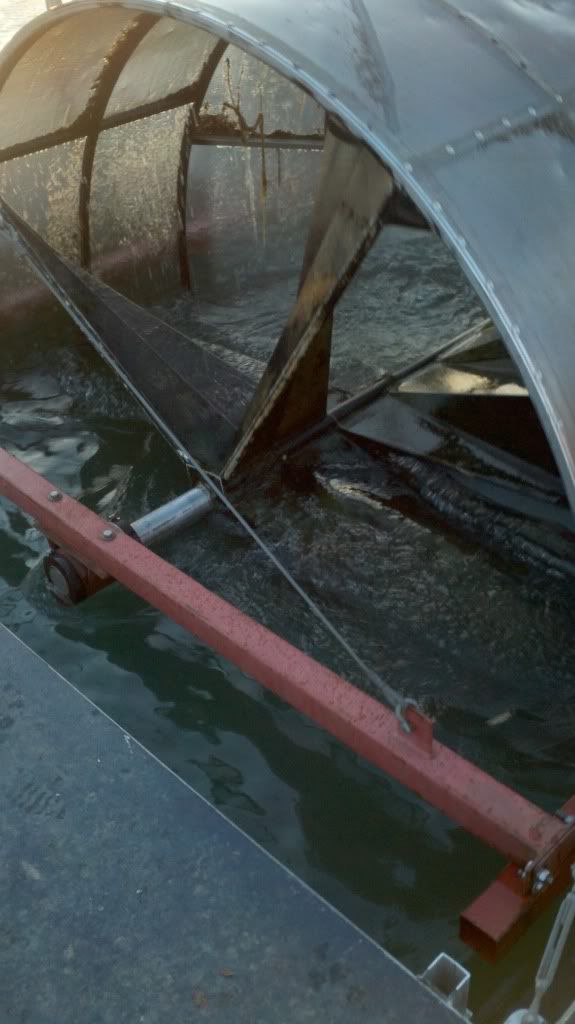
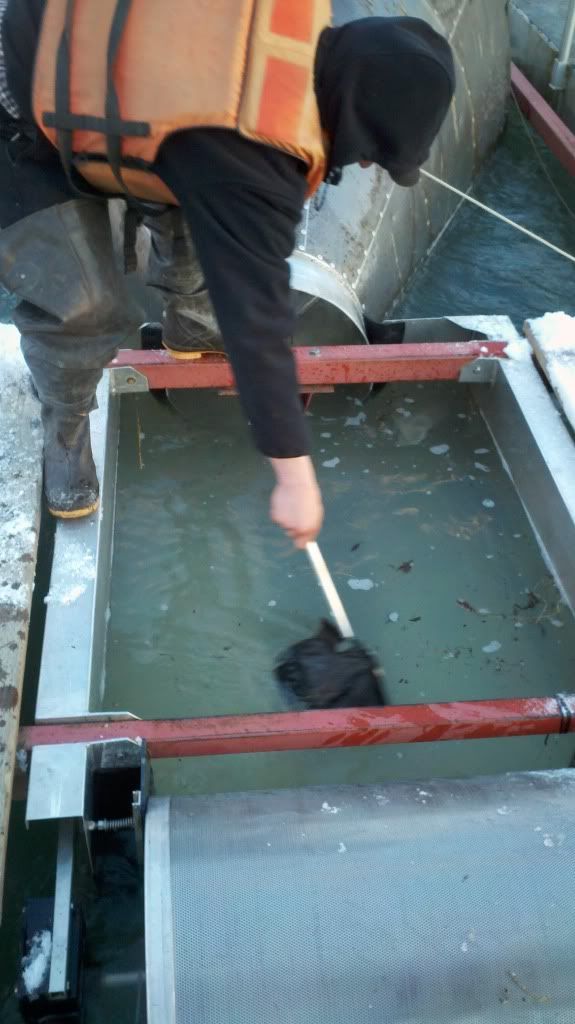
The trap operation is simple; the trap is moved into position using 2 large winches and a long "rope", we crank it out into the thalweg (main river channel) and lock down the winches, the large cone at the front of the trap is then lowered into the water using 2 more winches and steel cables. The trap is filled with corrugated bisections that cause the cone to spin as water flows through the throat of the trap. As the cone spins it creates a suction that will not allow small fishes to escape (large ones just swim right out). Once the fish have been trapped in the vortex the are carried down the throat of the trap and into the "live box" at the back of the trap where they swim around and wait to be collected for sampling. Once collected we take size and species data before returning them to the water unharmed. Some people use clove oil to anesthetize the fish, but for the most part we do not, I have found it is more efficient for us and healthy for the fish is we do not.

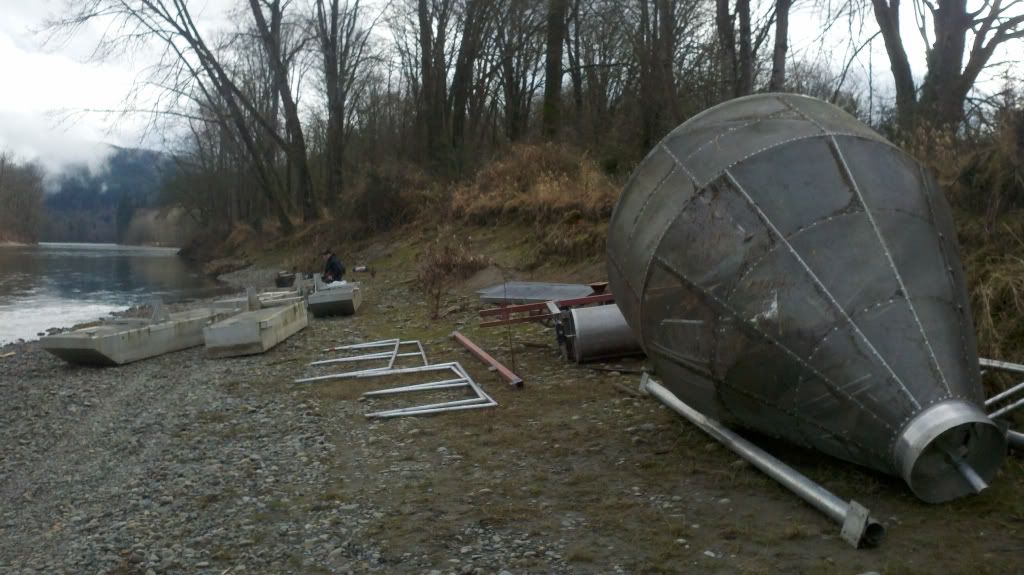
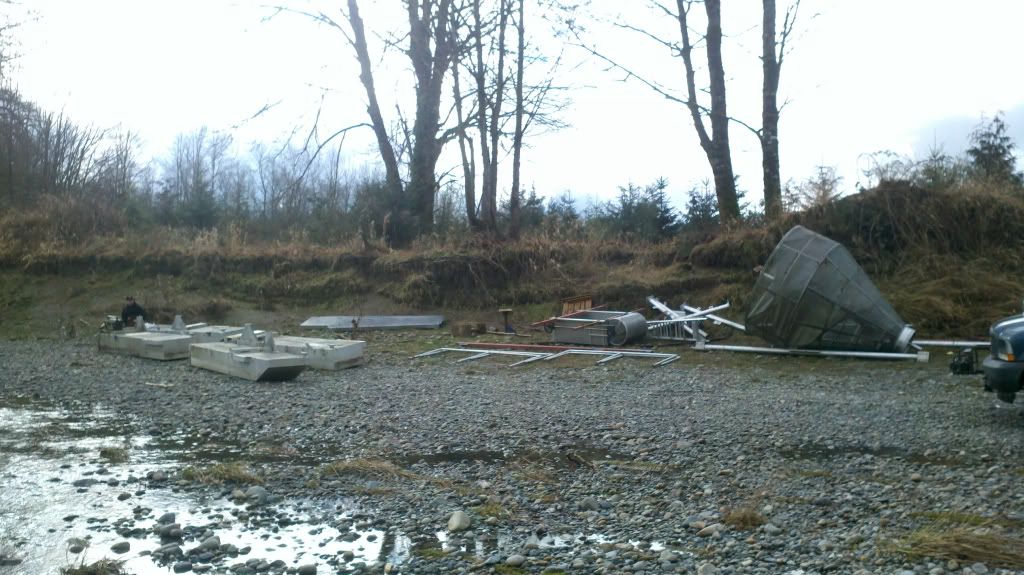
This is what the trap looks like before it is assembled. These pieces are kept in storage facilities on the Tulalip Reservation and are transported to the site VIA flatbed trailer or truck. Moving some of these pieces is difficult as they are rigid, large, and very heavy. Each pontoon takes 4 people to lift, and once you pick them up, you aren't moving them very far. The cone is both heavy as well as precarious, it is by far the most difficult piece to move.


Image
Image

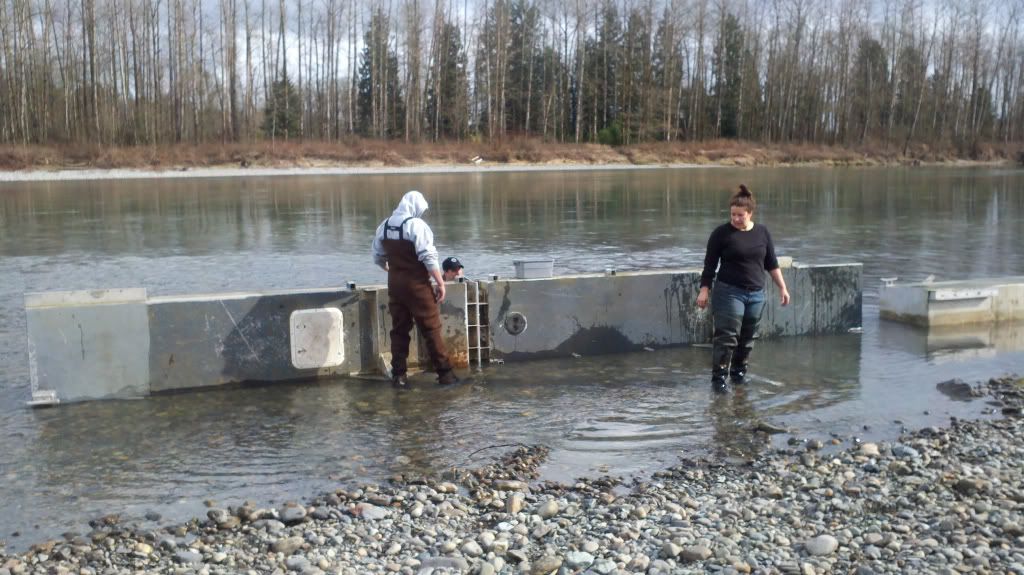
We begin by constructing the pontoons which will act as the foundation of the entire trap. They begin in 4 pieces and connect in the middle.


Image
Image

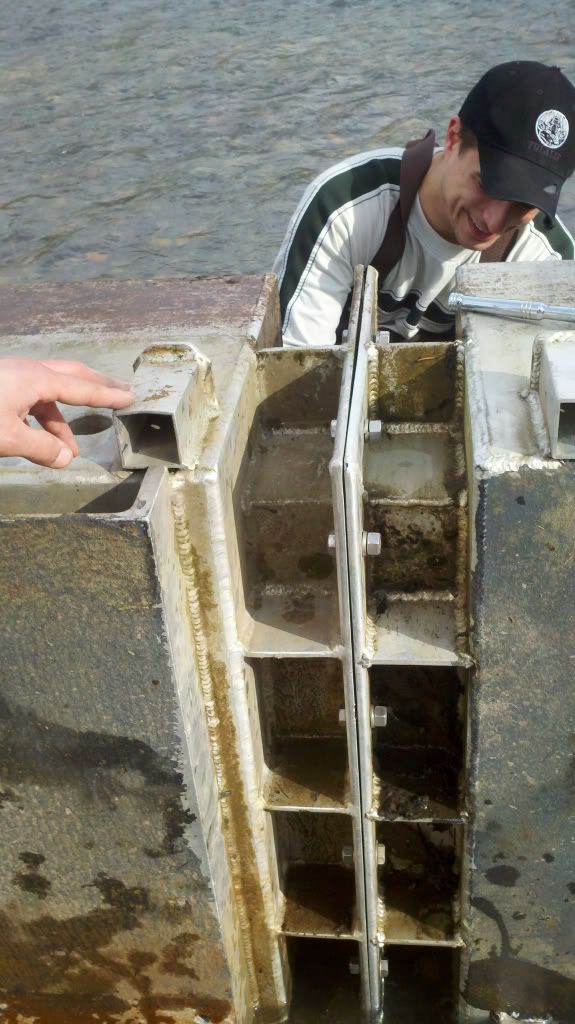
Once the pontoons are both constructed, we place the front and rear walkway in place and ad the uprights that will hold the cone and livebox in place VIA steel cable and retention chains while the trap is fishing. The walkways slide easily into place and are later bolted down, and the uprights just slide into fitted aluminum sleeves, this is the easy part. Once the uprights are in position we begin affixing the upper cross braces; each bar has 4 holes for bolts, and lining them up is difficult as the trap tends to want to twist and turn with the insertion of each bolt.

Image
Image
Image

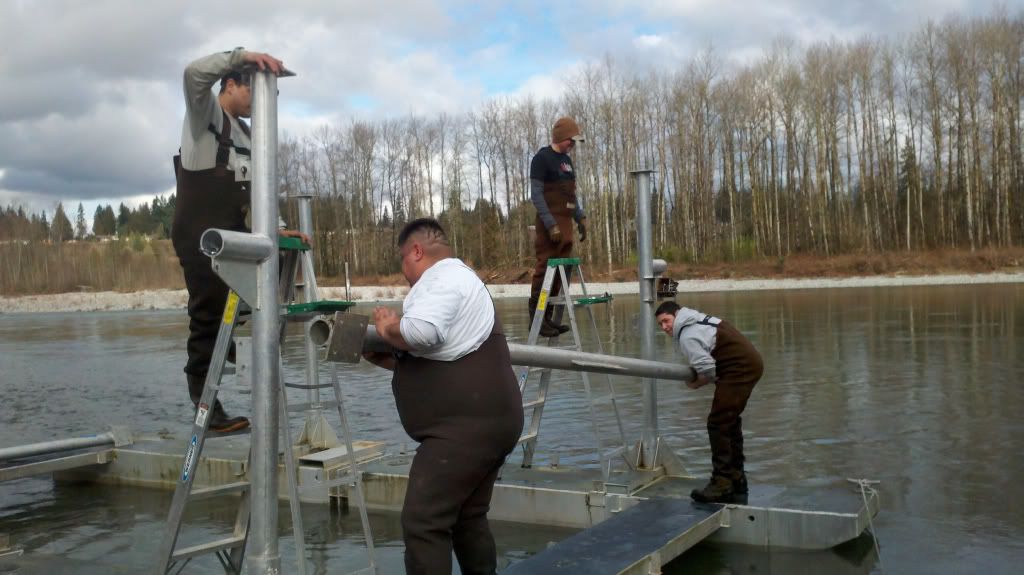
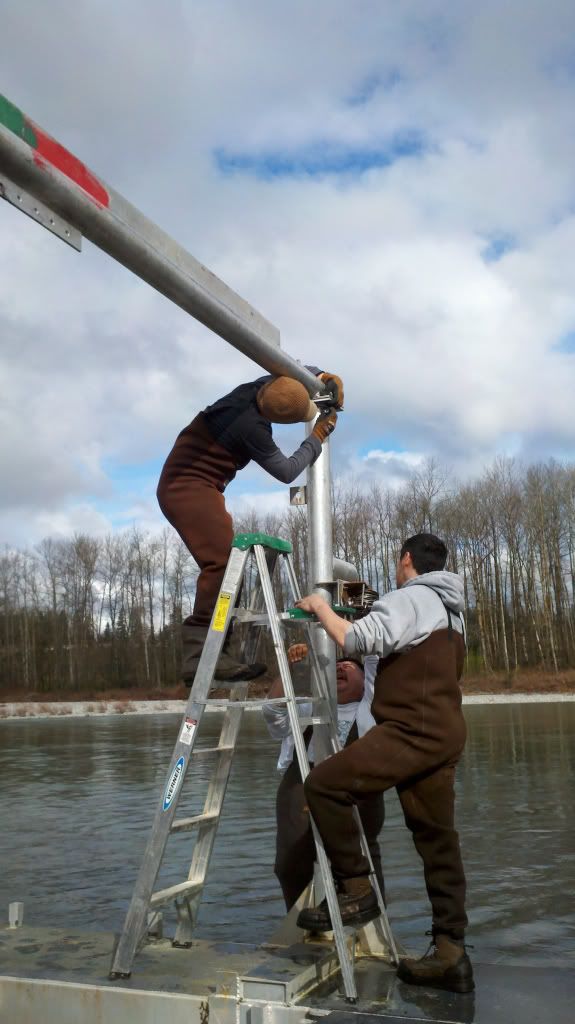
Once we have both of the top crossbars in place, we connect the whole network with handrails and add steel cables for cross bracing stability between the uprights.

Image

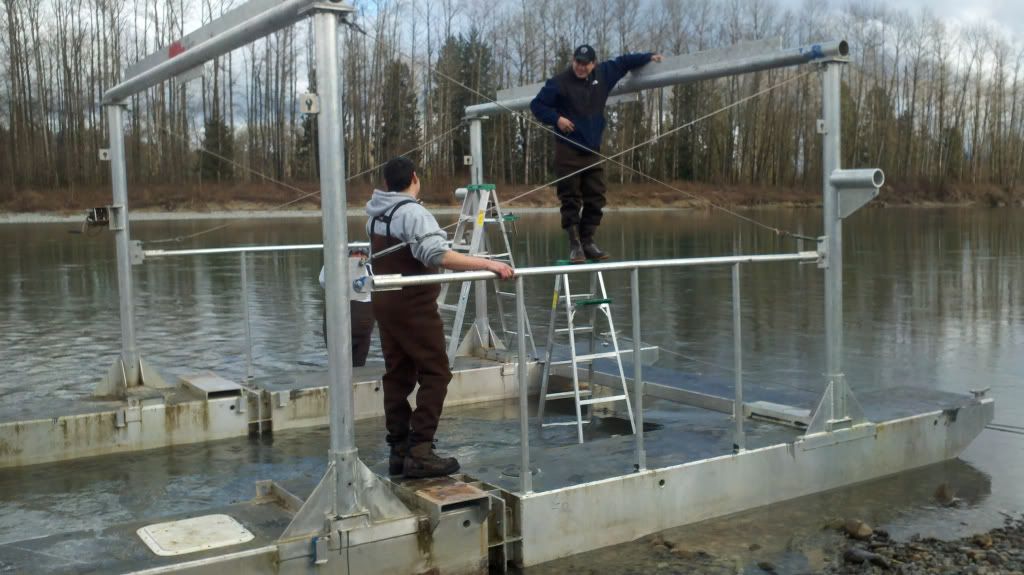
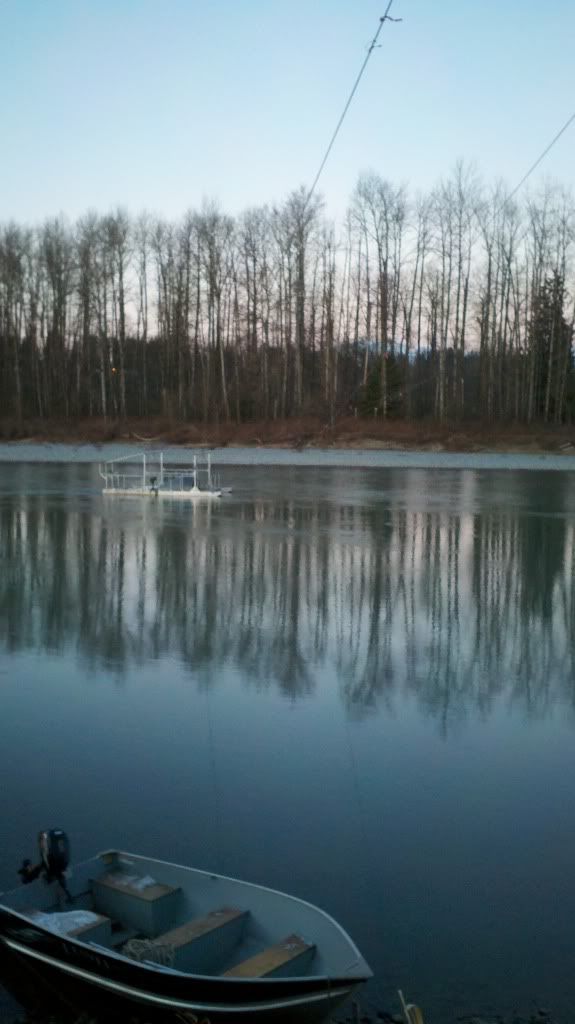
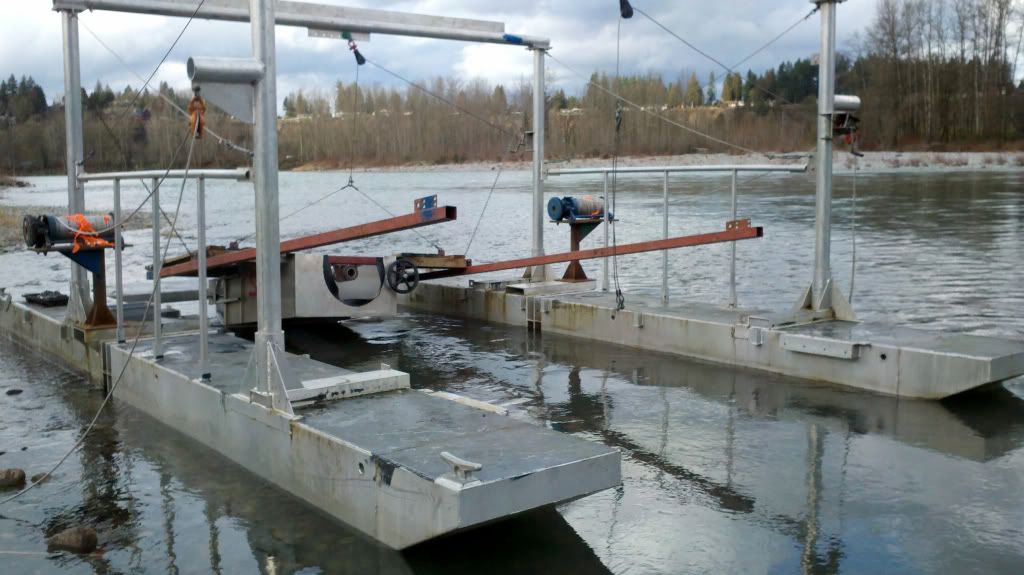
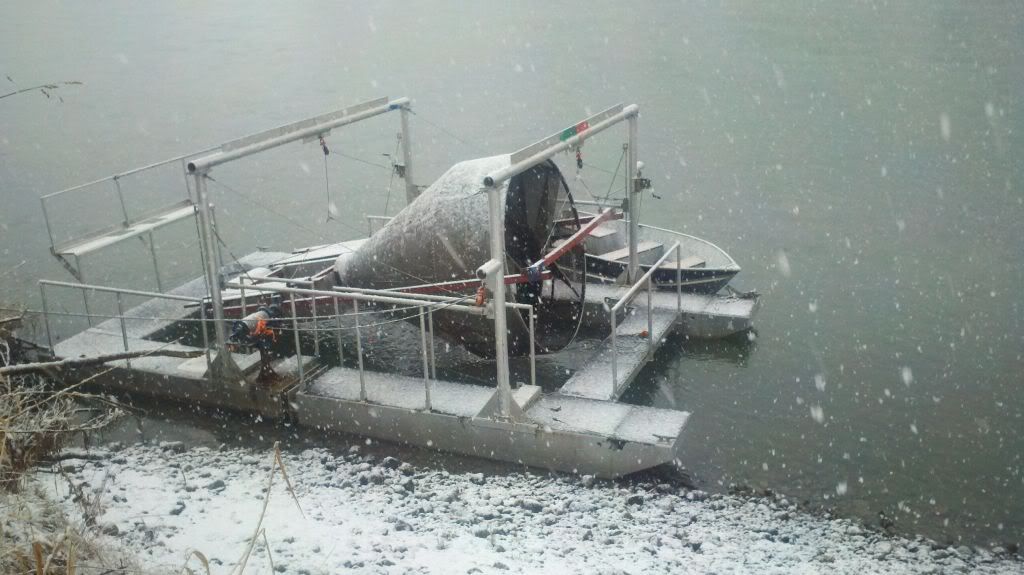
Pulleys are attached to the center of each crossbar. Through these we will thread a large diameter steel cable which holds the weight of the cone and livebox. The cone is raised and lowered with winches, when not fishing the cone is stored up and out of the water, this is frequently how the traps will be seen when on the water if a crew is not actively working at the site.

Image


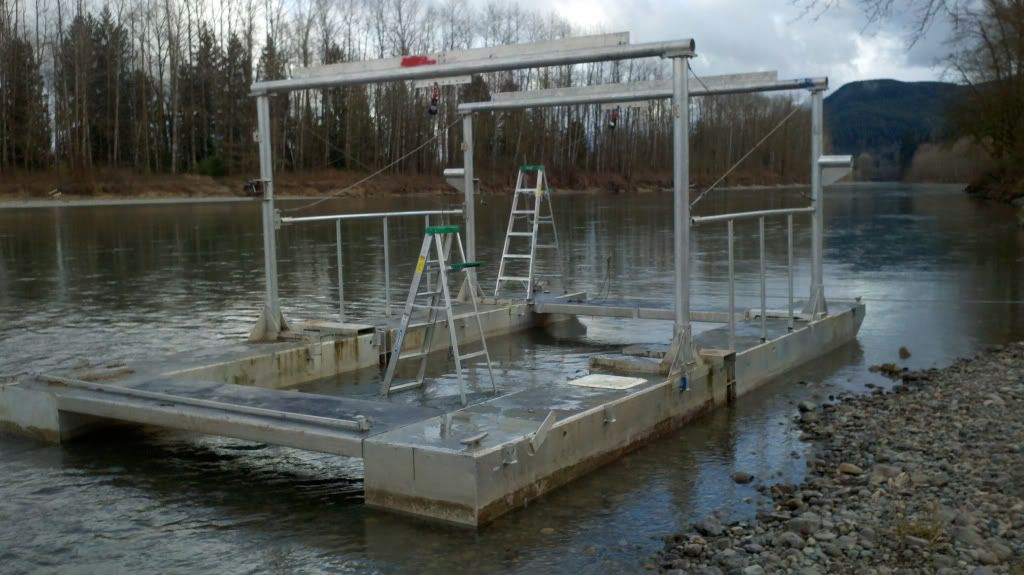
This is what we have at this point, a partially complete trap including pontoons, walkways, uprights, and crossbars.


Image

Next comes the hard part, installing the livebox, its frame, and the large aluminum cone. We start by moving the livebox into place and installing the left and right portions of the frame (red).

Image

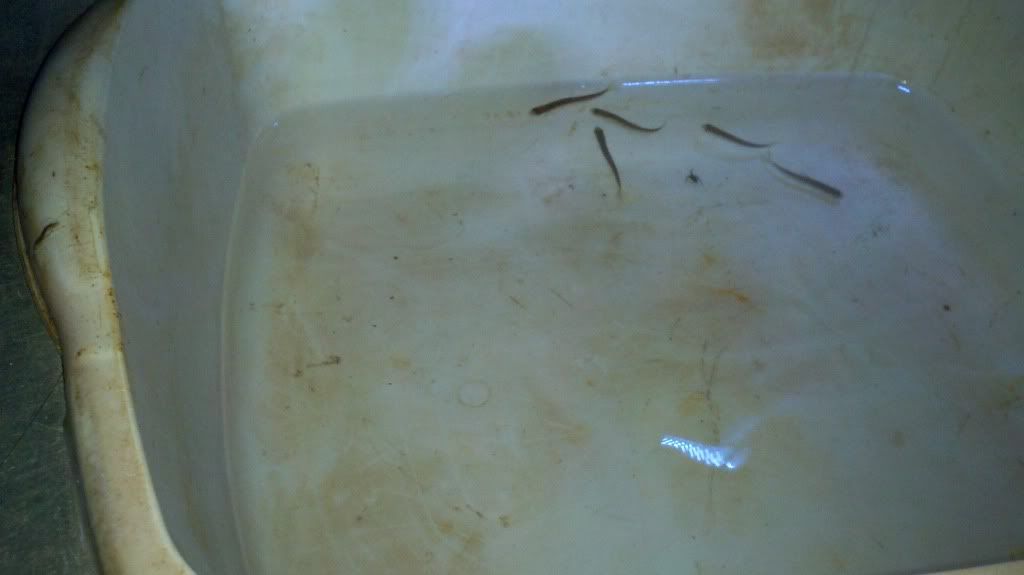
This is what the livebox looks like. This is where the juvenile fish will be trapped and await sampling once they have entered the front of the cone.


Image

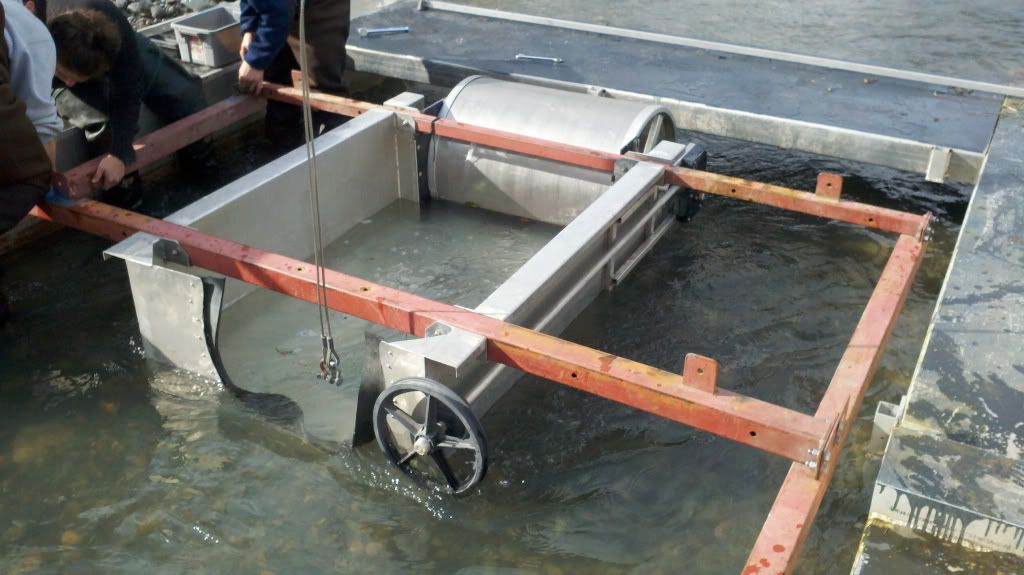
Here we are attaching the bearing that the back of the cone will seat into. It is a steel and delrin piece that spins as the cone spins. The wooden decks on either side of the livebox are where we kneel or sit as we scoop up the fry/smolts awaiting sampling in the livebox. In this image you can also see the steel cable is now attached to the livebox, this will allow the trap to be raised and lowered into the water when fishing/not fishing.

Image

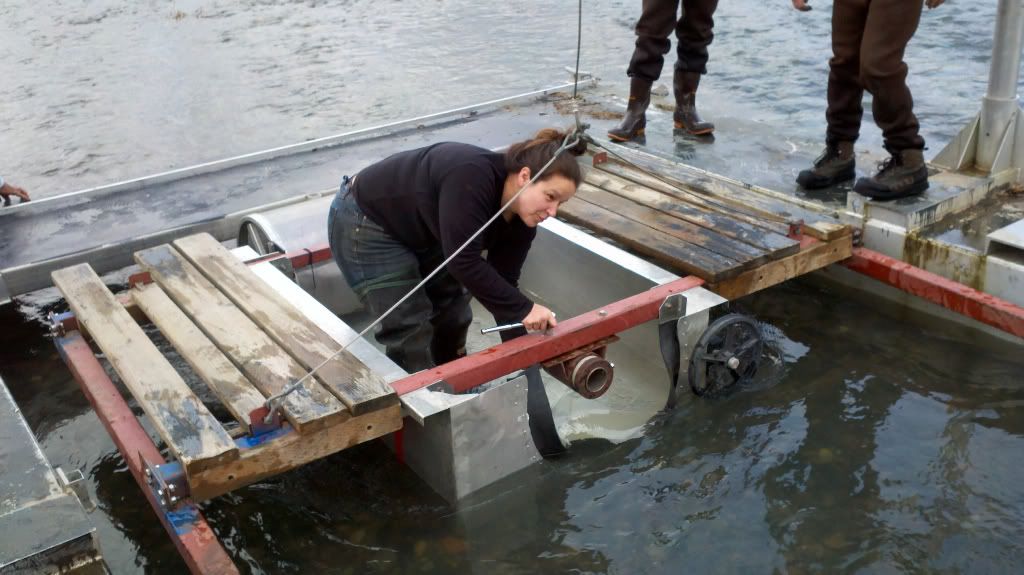
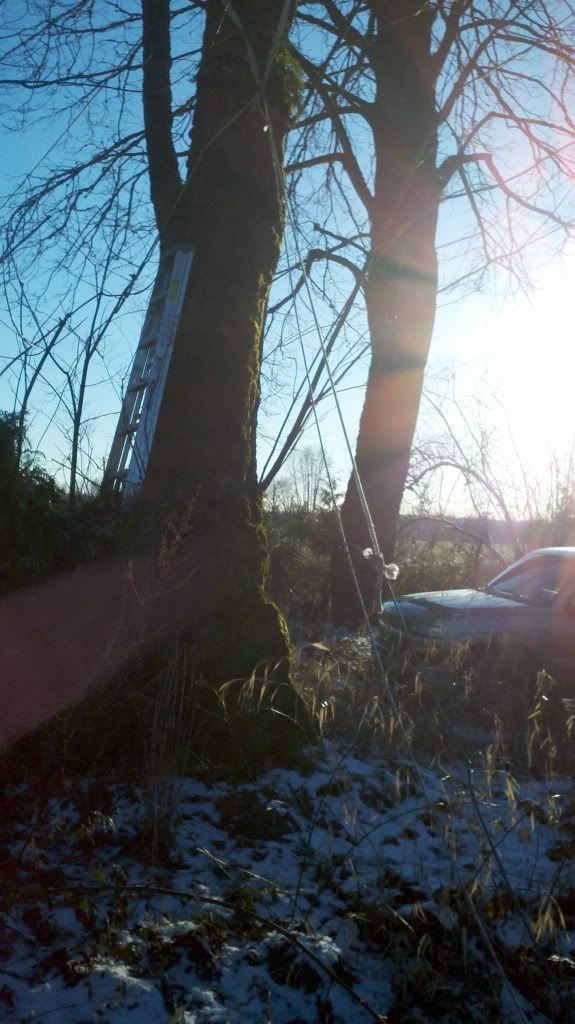
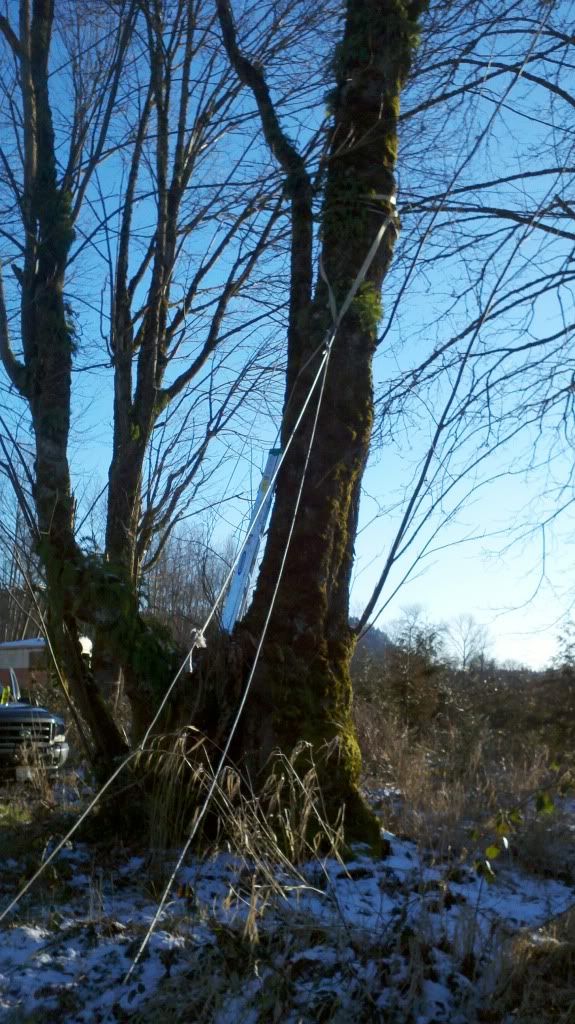
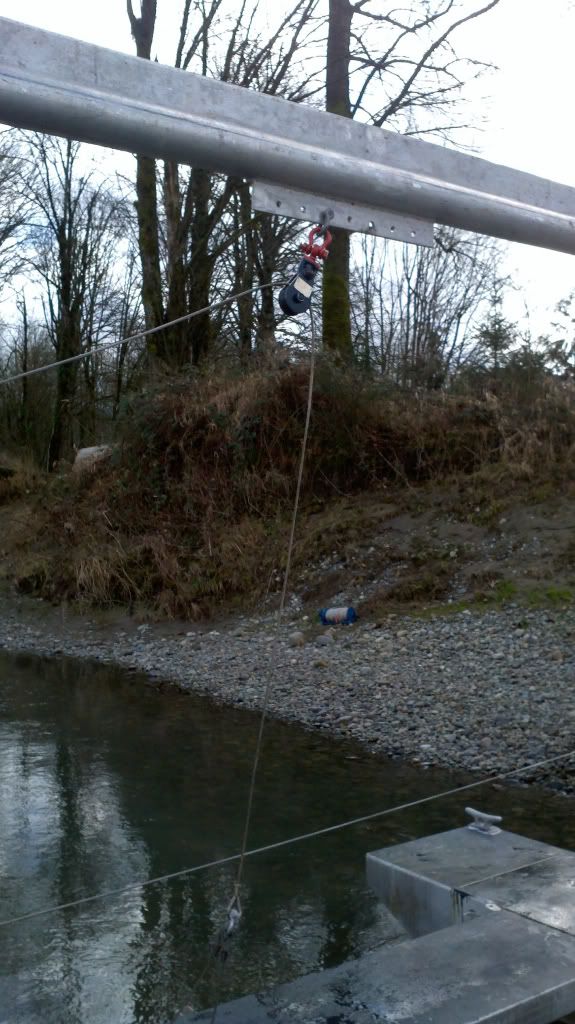
This is where we stand once the livebox and its frame have been installed. They have been raised to accommodate the cone (once we can move he darn thing over here!). Also, you can see in this photo we have attached the 2 main winches onto pedestals on each side of the pontoons. These are used to move the traps out into the river, or back to the shore. They will be attached to a line that runs from bank to bank (attached up in the air to trees on either bank). Flagging can be seen on the winch spool, this is a warning to boaters when the line is lowered near the river if we are setting or removing the trap (starting and stopping shifts), when we move the trap these lines will be touching the water, when it is fishing these lines are roughly 20 feet in the air.

Image
Image


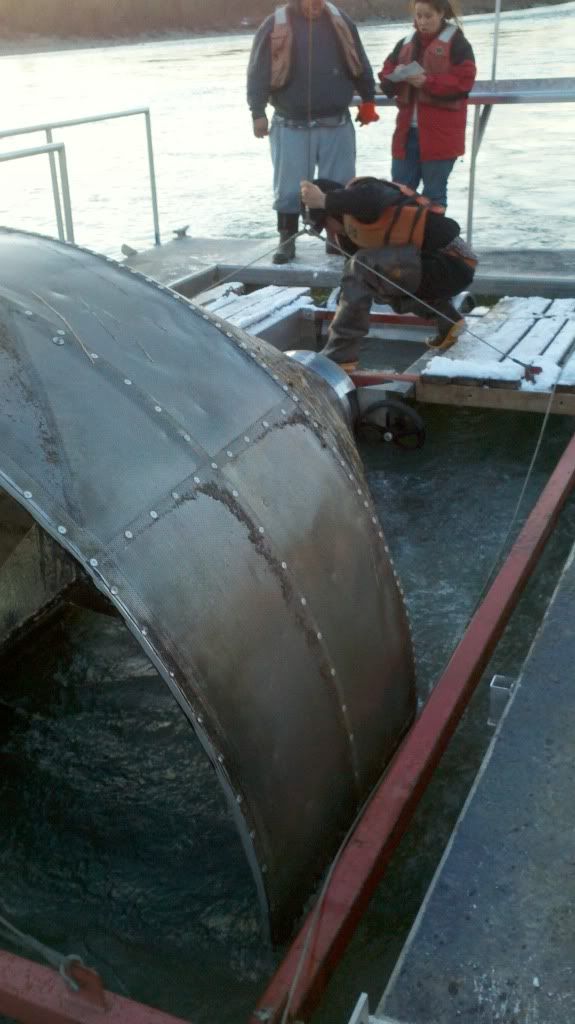
Next we move on to the cone. We more or less roll the cone into position, the trap is moved back and out of the way, we roll the cone down into the water, and we then push the livebox and frame up and around the cone so it can be affixed. Sounds easy, but it ain't! This is the most difficult portion of assembly.


Image
Image


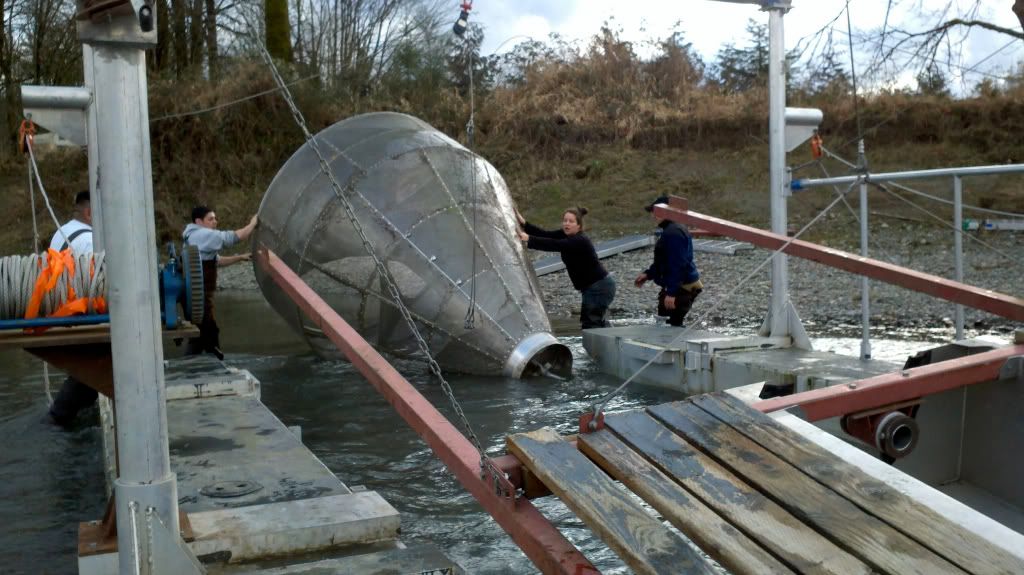
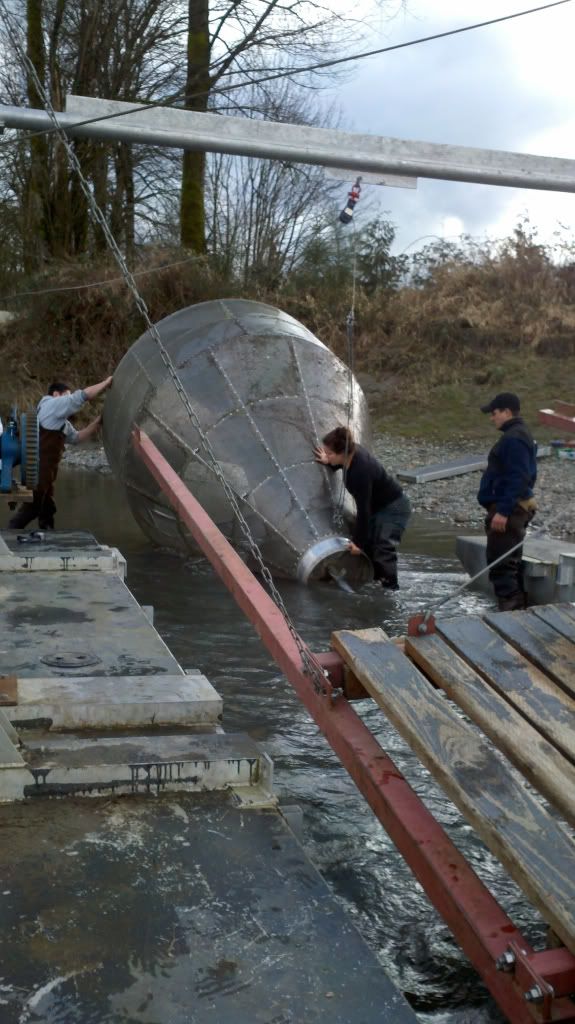
Here is a view of the cone from the front. From this angle you can understand how the flowing water would force the trap to rotate. Quite ingenious design. In order to move the cone into place the front walkway was removed, here you can se
Last edited by Anonymous on Fri Feb 18, 2011 10:23 pm, edited 1 time in total.
"When I grow up I want to be,
One of the harvesters of the sea.
I think before my days are done,
I want to be a fisherman."

User avatar
dicinu
Commander
Posts: 460
Joined: Fri Oct 08, 2010 7:00 pm
Location: fed way washing

RE:Pictorial: Construction of a Rotary Screw Trap

Post by dicinu » Thu Feb 17, 2011 6:55 pm

nice post Matt thanks this is interesting to say the least.
Proud member of http://www.WAGUNS.ORG" onclick="window.open(this.href);return false;
Proud Member of http://www.washingtonlakes.com" onclick="window.open(this.href);return false;

follow my blog http://washintgonstatefishing.blogspot.com/" onclick="window.open(this.href);return false;

User avatar
reigndawgs
Commander
Posts: 367
Joined: Sun Apr 29, 2007 8:45 pm
Location: Sammamish

RE:Pictorial: Construction of a Rotary Screw Trap

Post by reigndawgs » Thu Feb 17, 2011 6:57 pm

Very cool man!

User avatar
Toni
Sponsor
Sponsor
Posts: 3186
Joined: Mon Apr 30, 2007 10:47 pm
Location: Graham

RE:Pictorial: Construction of a Rotary Screw Trap

Post by Toni » Thu Feb 17, 2011 7:17 pm

It amazes me how a person could even think this up. How often does the live box get looked at? What happens to it in a flood?
Look for Wannafish A Lure on FaceBook

He said, “Throw your net on the right side of the boat and you will find some.” When they did, they were unable to haul the net in because of the large number of fish.

User avatar
Matt
Admiral
Posts: 2186
Joined: Sat Apr 28, 2007 1:56 pm
Location: WaRshington

RE:Pictorial: Construction of a Rotary Screw Trap

Post by Matt » Thu Feb 17, 2011 7:26 pm

This particular unit was designed by a company in Corvallis, Oregon and I would have to agree with you Toni the design is quite ingenious. The duration of the checks depends upon a number of factors, on a typical day with low flows and a light amount of fish in the river we will check the trap every 4 hours, in cases of extreme flows, heavy debris torrents, or lots of fish to sample we will check it every hour or hour and a half. During pink years when there are millions of fry in the system each check can take up to 2 hours of solid scooping and sampling. Watching the gauges like a hawk is the job of myself and the head bio. We have determined what levels are safe to operate the trap, and beyond that we will remove the trap (just pull it up close to the bank). If we see the weather is going south or the rivers are shooting up fast we will pull the trap for safety reasons. Once the trap is alongside the bank we just PRAY that nothing hits it and takes the whole thing downstream. The ropes holding the trap in place are a product made by amsteel and they have a tensile strength of (I believe) well over 20 or 30,000 lbs. There have been instances in the past when the trap broke free due to being hit by a full tree and it was located downstream, recovered, and repaired.

There is no cut and dry guidelines for operating the thing due to the fact that nature marches to the beat of its own drum, but the key is safety first and "go with the flow" lol.
Last edited by Anonymous on Thu Feb 17, 2011 7:31 pm, edited 1 time in total.
"When I grow up I want to be,
One of the harvesters of the sea.
I think before my days are done,
I want to be a fisherman."

User avatar
Marc Martyn
Rear Admiral Two Stars
Posts: 4100
Joined: Sun Apr 08, 2007 1:01 am

RE:Pictorial: Construction of a Rotary Screw Trap

Post by Marc Martyn » Thu Feb 17, 2011 9:09 pm

Well done, Matt. [thumbsup] This will be a great addition to the river section. I made it a "sticky" so that it doesn't get lost in the forum posts. We are looking forward to you continuous updates.

User avatar
Gringo Pescador
Moderator
Moderator
Posts: 2564
Joined: Wed May 23, 2007 8:35 am

RE:Pictorial: Construction of a Rotary Screw Trap

Post by Gringo Pescador » Fri Feb 18, 2011 7:56 am

:thumleft: Very cool - thanks for taking the time to take the pics, post em up and put words to them - again VERY Cool
I fish not because I regard fishing as being terribly important, but because I suspect that so many of the other concerns of men are equally unimportant, and not nearly so much fun. ~ John Volker

User avatar
Matt
Admiral
Posts: 2186
Joined: Sat Apr 28, 2007 1:56 pm
Location: WaRshington

RE:Pictorial: Construction of a Rotary Screw Trap

Post by Matt » Fri Feb 18, 2011 4:07 pm

No new updates today, we had some problems with simple stuff holding us back (that's the nature of this work most of the time) and we had to have a professional tree climber come out and help us do some more work.

Thanks for all the comments so far guys, I really enjoy sharing things with yall!
"When I grow up I want to be,
One of the harvesters of the sea.
I think before my days are done,
I want to be a fisherman."

User avatar
fishingboy
Commander
Posts: 363
Joined: Mon Mar 03, 2008 1:35 pm
Location: Shoreline, washington

RE:Pictorial: Construction of a Rotary Screw Trap

Post by fishingboy » Fri Feb 18, 2011 7:39 pm

is that the Skykomish in sultan?
Largemouth:

PB: 6 pounds

2011: 6 Pounds

Smallmouth:

PB: 5 pounds

2011: 4 lbs

User avatar
Matt
Admiral
Posts: 2186
Joined: Sat Apr 28, 2007 1:56 pm
Location: WaRshington

RE:Pictorial: Construction of a Rotary Screw Trap

Post by Matt » Fri Feb 18, 2011 7:56 pm

This trap is located on the Sky about 2 miles above the Lewis St boat ramp, right below the Ben Howard drift boat launch.

The other trap will be up on the Snoqualmie in Duvall right at the Safeway.
"When I grow up I want to be,
One of the harvesters of the sea.
I think before my days are done,
I want to be a fisherman."

User avatar
BentRod
Admiral
Posts: 1913
Joined: Tue May 20, 2008 7:59 am
Location: Issaquah

RE:Pictorial: Construction of a Rotary Screw Trap

Post by BentRod » Fri Feb 18, 2011 9:25 pm

That's cool. Always thought they towed those things ready built from a boat launch. Gotta be a heck of a job when it's raining. Thanks for the pics.

User avatar
Matt
Admiral
Posts: 2186
Joined: Sat Apr 28, 2007 1:56 pm
Location: WaRshington

RE:Pictorial: Construction of a Rotary Screw Trap

Post by Matt » Fri Feb 18, 2011 9:32 pm

That is a possibility depending upon the size of the trap and the location it is in. We plan to assemble the Sno trap at the boat launch and tow it up to the site which is a few miles upriver (we have an 18' wooldridge with a Yam 150 pump at our disposal). Tulalip only has funding to operate this program for 6 months so these traps are constantly being moved, many organizations just leave the traps in the water indefinitely once they are built and fish them for the entire year.

The trap is 26 feet long and over 14 feet wide so transporting it whole on the road is impossible.

Working in the rain sucks, yeah, but working at night the worst weather patterns are extremely dense fog (low visibility) and freezing rain. Since the trap is fishing 24 hours half of the crew (including myself) work graveyard shift and the trap is frequently covered in a solid sheet of ice this time of year. If you set tools etc. down on the trap they instantly freeze to it.

We frequently see steelhead swimming near shore (with LED headlamps) when we motor the boat from the shore out to the trap. The most painful part is working from now until June looking at the river in perfect shape and not being able to fish it! As soon as June comes it is game on though and I fish nonstop during my downtime between checks!:cheers:
Last edited by Anonymous on Fri Feb 18, 2011 9:40 pm, edited 1 time in total.
"When I grow up I want to be,
One of the harvesters of the sea.
I think before my days are done,
I want to be a fisherman."

User avatar
blufin loui
Lieutenant
Posts: 249
Joined: Tue Oct 14, 2008 7:38 pm
Location: Chelan

RE:Pictorial: Construction of a Rotary Screw Trap

Post by blufin loui » Fri Feb 18, 2011 9:37 pm

Hey Matt, just wanted to echo what the others have said. Having heard of such operations, but having no idea what it entailed, so your time and efforts are appreciated. I now have a visual of the operation along with the details from you.
Thanks

User avatar
Matt
Admiral
Posts: 2186
Joined: Sat Apr 28, 2007 1:56 pm
Location: WaRshington

RE:Pictorial: Construction of a Rotary Screw Trap

Post by Matt » Wed Feb 23, 2011 8:34 pm

Well, we had a professional tree climber come out last Friday to add a rubber tire around out supporting tree for the main bow line on the opposite side of the river to help keep the line from biting into the tree. The plan was to stretch the lines and start fishing Tuesday for the first 24 hour shift.... unfortunately, this was what the trapping site looked like at 10am on Tuesday with snow steadily pouring down. Conditions proved to arduous to be climbing ladders and stringing skylines so we got the heck outa there! Today was worse, and tomorrow might be horrible still, so as of now we are planning to move forward with the project Friday morning pearly early.

Image
"When I grow up I want to be,
One of the harvesters of the sea.
I think before my days are done,
I want to be a fisherman."

User avatar
Matt
Admiral
Posts: 2186
Joined: Sat Apr 28, 2007 1:56 pm
Location: WaRshington

RE:Pictorial: Construction of a Rotary Screw Trap

Post by Matt » Tue Mar 01, 2011 3:05 pm

Well, its been a crazy first couple of weeks due to the unpredictable weather we have been having, but the trap is finally fishing. This week will be the first week that the trap will fish nonstop from Monday February, 28th until Thursday March, 3rd (or possibly on into Friday). We plan to construct the Snoqualmie trap next week and have it fishing by next week or the week after.


The biggest obstacle we face before we could get the trap fishing was attaching the bow line which sits some 20' above the river while the trap is fishing and stretches bank to bank. We use an Amsteel product rated to over 20,000lbs of tensile strength to secure the trap. This is the tree on the north bank of the river, at the land owners request we had to install a rubber buffer between the lines and the tree to keep the lines from biting into the tree over time.


Image[/img]


This is our buddy Dale, we hired him to climb the tree for us as I don't think the insurance company wanted us to do it ourselves. He is a super nice guy and was extremely helpful.


Image

Image

Image

Image

Image

Unfortunately I forgot to take a picture of the finished product, but we used a rubber innertube (the type you float down the river on) and cut it down the middle then wrapped it around the tree to protect the tree from damage. Next (after waiting several days for the snow to clear) using the boat we strung the bow line across the river and attached it to the existing lines already up in the tree. The first pic is the view of the trap from the other side of the river, the second pic is one of our Techs holding the line so it can be shackled in place. Holding onto this line is difficult is it is draping into the water at this point and the current is applying extreme pressure.

Image

Image

Once the bow line is in place, we run back across the river and grab the line from the winch connected to the trap. This line is then run BACK across river and shackled in to the main line with the bow line and the line attached to the tree. It sounds simple, but this whole process was a real pain! Here is what it looked like once we got both lines are attached across the river. Luckily fishing season is closed, otherwise someone has to remain on the boat at all times to stop traffic in the river while we attempt to get this all done..... jet boat owners tend to not like being told to stop and wait!

Image

The final part of the process is getting the excess slack out of the bow line. To do this we have to climb up into the tree on the South side of the river and use the winch on the Ford F350 to pull the bow line taught so it can be shackled up high into the tree. This series of pictures shows that process.

Image

Image

Image


Once the lines are up and everything is properly secured the trap is FINALLY out fishing! In this picture you can clearly see the section of the river we are trying to focus our effort on, the trap is in the main seam of current across the river from our headquarters/trailer and we try to get it out into the "thalweg" or main channel of the river.


Image
Last edited by Anonymous on Tue Mar 01, 2011 3:10 pm, edited 1 time in total.
"When I grow up I want to be,
One of the harvesters of the sea.
I think before my days are done,
I want to be a fisherman."

User avatar
Matt
Admiral
Posts: 2186
Joined: Sat Apr 28, 2007 1:56 pm
Location: WaRshington

RE:Pictorial: Construction of a Rotary Screw Trap

Post by Matt » Tue Mar 01, 2011 3:12 pm

Here is what the cone looks like once it is lowered into the water. It creates a vortex and the little fishes cannot escape! :cheers:

Image

After 2 and a half hours of fishing, it is time to check the trap. Here a tech is scooping up collected fish for sampling from the live box.

Image

Image


Our first check yielded about a half dozen chum fry. I will get more detailed pictures of the fish later, but when I was taking these pictures it was so cold that if you took the fish out of the water for more than a few seconds they would freeze to whatever they were resting on (your hand, the measuring board, the net, etc). Generally the night shift checks yield many many more fish, so the next series of photos will likely be taken in the dark. After ALLLLL of that hard work, here is what we are after.


Image

By the way, in case anyone was wondering. All of these photos have been taken with my phone, a Droid 2 Mobile.
Last edited by Anonymous on Tue Mar 01, 2011 3:18 pm, edited 1 time in total.
"When I grow up I want to be,
One of the harvesters of the sea.
I think before my days are done,
I want to be a fisherman."

EAmon___hoffman123
Warrant Officer
Posts: 109
Joined: Wed Jan 26, 2011 7:35 pm
Location: woodinville washington

RE:Pictorial: Construction of a Rotary Screw Trap

Post by EAmon___hoffman123 » Sat Jun 18, 2011 2:51 pm

this is very interesting, thank you for showing it to us:-]
Fishing is cool. FOOLS

User avatar
FishingThePacNW
Commander
Posts: 454
Joined: Mon May 02, 2011 10:42 pm

RE:Pictorial: Construction of a Rotary Screw Trap

Post by FishingThePacNW » Mon Jun 27, 2011 10:02 pm

Very cool sounds fun!!
Fishing to me isnt a hobby its a lifestyle, a passion.

TheHunt
Petty Officer
Posts: 50
Joined: Wed Jan 18, 2012 9:12 pm

Re: Pictorial: Construction of a Rotary Screw Trap

Post by TheHunt » Sun Jan 22, 2012 5:01 pm

That is really cool technology. It is pretty amazing machine. Is there a guard on duty 24X7 to keep the metal theives from doing something stupid?

User avatar
afk
Petty Officer
Posts: 77
Joined: Sun May 03, 2009 6:59 am
Location: E.Wenatchee
Contact:

Re: Pictorial: Construction of a Rotary Screw Trap

Post by afk » Sat Feb 18, 2012 8:52 am

Great stuff! I've read about these & seen them but, your pictures and working knowledge make for an incredible post.
Thank you

Post Reply